
The experience on my 2nd attempt was even worst. While waiting for the dough to rise, my son came down with high fever during his afternoon nap. It left me no choice but to send the dough straight to the freezer. Luckily, the dough was still edible after my long holiday in December.
From all these failures, I learnt 3 important things – (1) the dough must be well-kneaded until it is smooth and elastic, (2) the dough must get enough time to rise and (3) tossing pizza - I have not mastered this skill yet. To save time, I cheated by rolling out the pizza and then strecthing it further using my knuckles. You can say that practice makes perfect and your hands are the best judge when the dough is done just right.
As a non risk-taker, I plan to make a small-sized pizza so it is less wastage in case of failure. However, most of the wonderful pizza recipes that I like, yield larger size pizza. After much searching, I decided to adapt and modify a recipe from Mitong’s blog (click here) as her recipe requires only a small amount of ingredients. It is also very easy to follow thru with her step-by-step instruction. Although it may not be the most “authentic” pizza recipe, it had at least boosted my confidence to take the first step in my pizza making journey. Meanwhile, I had also incorporated some useful tips from Rose’s Recipe in my recipe.
During my past few attempts in making pizza, I had encountered many technical issues which I couldn't figure out. Luckily, there are some kind-hearted people who are willing to share their valuable advices and tips with me. Hence, let me take this opportunity to thanks everyone who had advised me before. Without them, I will not be able to write up this posting.
I had tried to keep this recipe as simple as possible so that it will be easy for any beginner to bake their first successful homemade pizza. Making your own pizza is not really as difficult as you think. The more you try, the more you will love making it. You don't need to bake the best pizza in town. But I can guarantee you that your kids will be the happiest people in the world when eating your homemade pizza. Look at the photos below. Do you agree with me?

(A) Basic pizza sauce
Ingredients:
½ can diced tomatoes (I used tomato sauce when I made this pizza. But diced tomato is still a better choice)
2 tsp tomato paste
1 tsp minced garlic
½ onion (minced)
1 pc bay leaf
1 tsp mixed herbs
2 tbsp olive oil
100ml stock
2 tsp sugar
Salt and pepper to taste
Methods:
1) Heat up oil in a pan. Stir-fry garlic, onion and mixed herbs until fragrant.
2) Add in diced tomatoes, stock, bay leaf, tomato paste, salt, sugar and pepper.
3) Simmer for 30 mins, or until the tomatoes have reduced to a thick pulp.
4) If you prefer a smooth pizza sauce, let the sauce cool a little and then puree it in a blender.
5) If the sauce is too watery, add some cornstarch to thicken it.
6) You can make this sauce one day in advance.
(B) Basic pizza dough (makes 1 x 11 inches pizza)
Ingredients:
200g bread flour (high protein flour)
1 tsp instant yeast
½ tsp salt
2 tbsp olive oil
120g lukewarm water (45 C)
Methods:
1) In a small bowl, dissolve yeast with some lukewarm water. Let it stand until the yeast becomes creamy (about 8-10 mins).
2) In a large mixing bowl, whisk bread flour and salt to mix. Make a well in the center. Pour in yeast (from step 1) and oil. Fold with a large spoon or spatula. Add in the remaining water little by little till all the ingredients are well combined. Flour your hands and knead briefly to form a soft dough.
3) Bring the dough out and continue kneading on a lightly floured surface until smooth and elastic (about 10 mins). During kneading, if the dough is too dry, sprinkle in a little more flour. If the dough is too wet, dribble in 1-2 tsp of water.
4) Place the dough in a lightly greased bowl, turning once (to make sure it is coated with oil) and cover with a damp cloth/ cling wrap.
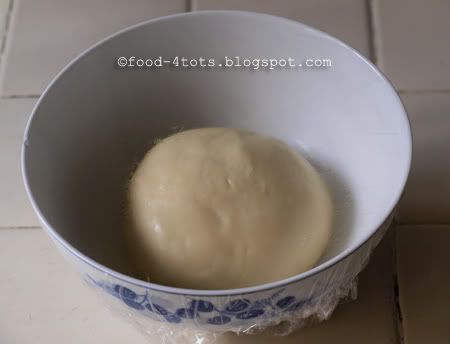
5) Let it to rise in a warm place until the dough has doubled in size. It takes about 1-1 ½ hours.
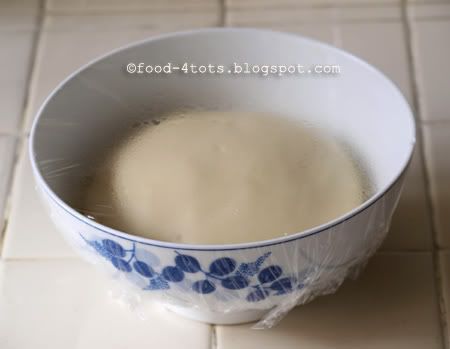
6) Gently punch down to deflate the dough. Knead and shape into a ball.
7) Stretch the dough using your hands or roll it out using rolling pins to your desired thickness. Tossing pizza is an important step in producing a more tender and crispy crust. Watch this video clip for the technique.
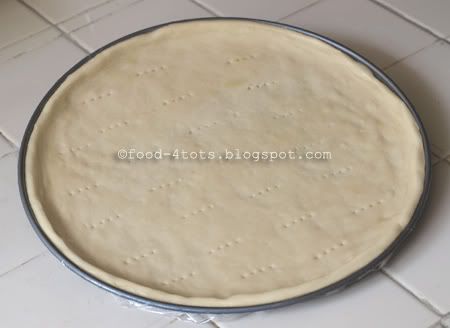
8) Place the dough on a lightly greased pizza pan. Push up the dough to make a rim or a twisted border. Use a fork to prick some holes on the pizza. (This is my personal preference. You can omit this). Brush or spray the dough lightly with olive oil. Cover with cling wrap and let it rest for 15 mins.
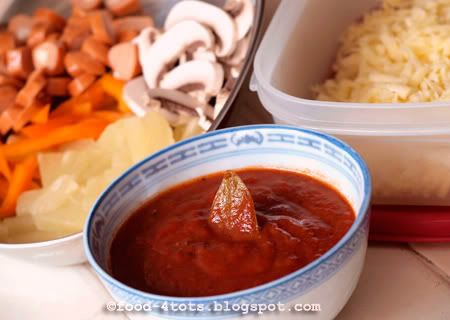
9) Prepare your toppings (such as capsicum, sliced black olive, pineapple cubes, cherry tomatoes, fresh sliced mushrooms, sweet corns, cooked shredded chicken, cooked prawns, hams, sliced sausages, canned tuna, pepperoni etc).
10) Preheat oven to 200C.
11) After 15 mins, lightly spread the dough with pizza sauce, and then follow by cheese and lastly your choice of toppings. You can also add some extra cheese on top of your toppings.
12) Bake at 200C for 15-20 mins, or until it turns golden brown.
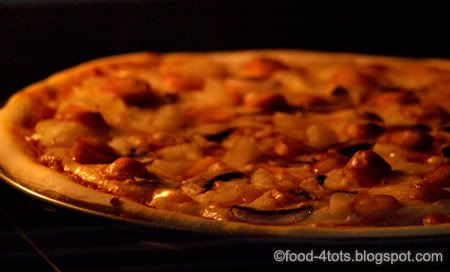
13) Remove the pizza from the oven and transfer to a cutting board. Wait for 3-5 mins before slicing to allow the cheese to set.
Tips:
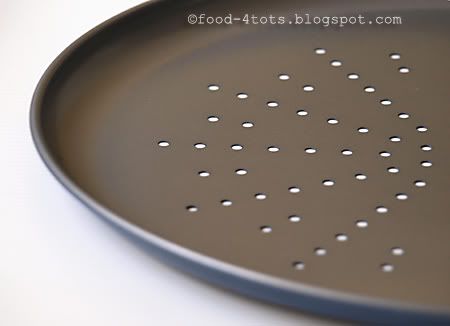
1) To help the baking process and make the crust more crispy, use pizza pan with holes. Thanks to CY from Eat First, Diet Later for this recommendation.
2) To absorb the moisture of the dough and add some crunchiness to the pizza, I used semolina flour before pushing out my pizza. Watch this video clip. Thanks to Sedazh of Annemin Sable Biskuvisi for her recommendation on using semolina.
3) Do not overload the pizza with your toppings. Otherwise, the dough will not be cooked thoroughly. Avoid using ingredients that are too wet.
5) You can freeze the dough after kneading (step 3), put it in a lightly oiled container/ zipper bag) and freeze. On the day of making pizza, bring it out from the fridge. Cover and thaw for 2 hours. Let it rise according to the spec.
6) You can also half bake the pizza dough and keep for future usage. This result is similar to those pre-baked dough sold in the supermarket.
Other useful references:
-Video clip (how to make pizza) - click here
- Kitchen unplugged
- Eat First, Diet Later
From all these failures, I learnt 3 important things – (1) the dough must be well-kneaded until it is smooth and elastic, (2) the dough must get enough time to rise and (3) tossing pizza - I have not mastered this skill yet. To save time, I cheated by rolling out the pizza and then strecthing it further using my knuckles. You can say that practice makes perfect and your hands are the best judge when the dough is done just right.
As a non risk-taker, I plan to make a small-sized pizza so it is less wastage in case of failure. However, most of the wonderful pizza recipes that I like, yield larger size pizza. After much searching, I decided to adapt and modify a recipe from Mitong’s blog (click here) as her recipe requires only a small amount of ingredients. It is also very easy to follow thru with her step-by-step instruction. Although it may not be the most “authentic” pizza recipe, it had at least boosted my confidence to take the first step in my pizza making journey. Meanwhile, I had also incorporated some useful tips from Rose’s Recipe in my recipe.
During my past few attempts in making pizza, I had encountered many technical issues which I couldn't figure out. Luckily, there are some kind-hearted people who are willing to share their valuable advices and tips with me. Hence, let me take this opportunity to thanks everyone who had advised me before. Without them, I will not be able to write up this posting.
I had tried to keep this recipe as simple as possible so that it will be easy for any beginner to bake their first successful homemade pizza. Making your own pizza is not really as difficult as you think. The more you try, the more you will love making it. You don't need to bake the best pizza in town. But I can guarantee you that your kids will be the happiest people in the world when eating your homemade pizza. Look at the photos below. Do you agree with me?

(A) Basic pizza sauce
Ingredients:
½ can diced tomatoes (I used tomato sauce when I made this pizza. But diced tomato is still a better choice)
2 tsp tomato paste
1 tsp minced garlic
½ onion (minced)
1 pc bay leaf
1 tsp mixed herbs
2 tbsp olive oil
100ml stock
2 tsp sugar
Salt and pepper to taste
Methods:
1) Heat up oil in a pan. Stir-fry garlic, onion and mixed herbs until fragrant.
2) Add in diced tomatoes, stock, bay leaf, tomato paste, salt, sugar and pepper.
3) Simmer for 30 mins, or until the tomatoes have reduced to a thick pulp.
4) If you prefer a smooth pizza sauce, let the sauce cool a little and then puree it in a blender.
5) If the sauce is too watery, add some cornstarch to thicken it.
6) You can make this sauce one day in advance.
(B) Basic pizza dough (makes 1 x 11 inches pizza)
Ingredients:
200g bread flour (high protein flour)
1 tsp instant yeast
½ tsp salt
2 tbsp olive oil
120g lukewarm water (45 C)
Methods:
1) In a small bowl, dissolve yeast with some lukewarm water. Let it stand until the yeast becomes creamy (about 8-10 mins).
2) In a large mixing bowl, whisk bread flour and salt to mix. Make a well in the center. Pour in yeast (from step 1) and oil. Fold with a large spoon or spatula. Add in the remaining water little by little till all the ingredients are well combined. Flour your hands and knead briefly to form a soft dough.
3) Bring the dough out and continue kneading on a lightly floured surface until smooth and elastic (about 10 mins). During kneading, if the dough is too dry, sprinkle in a little more flour. If the dough is too wet, dribble in 1-2 tsp of water.
4) Place the dough in a lightly greased bowl, turning once (to make sure it is coated with oil) and cover with a damp cloth/ cling wrap.

5) Let it to rise in a warm place until the dough has doubled in size. It takes about 1-1 ½ hours.

6) Gently punch down to deflate the dough. Knead and shape into a ball.
7) Stretch the dough using your hands or roll it out using rolling pins to your desired thickness. Tossing pizza is an important step in producing a more tender and crispy crust. Watch this video clip for the technique.
8) Place the dough on a lightly greased pizza pan. Push up the dough to make a rim or a twisted border. Use a fork to prick some holes on the pizza. (This is my personal preference. You can omit this). Brush or spray the dough lightly with olive oil. Cover with cling wrap and let it rest for 15 mins.

9) Prepare your toppings (such as capsicum, sliced black olive, pineapple cubes, cherry tomatoes, fresh sliced mushrooms, sweet corns, cooked shredded chicken, cooked prawns, hams, sliced sausages, canned tuna, pepperoni etc).

10) Preheat oven to 200C.
11) After 15 mins, lightly spread the dough with pizza sauce, and then follow by cheese and lastly your choice of toppings. You can also add some extra cheese on top of your toppings.
12) Bake at 200C for 15-20 mins, or until it turns golden brown.

13) Remove the pizza from the oven and transfer to a cutting board. Wait for 3-5 mins before slicing to allow the cheese to set.
Tips:
1) To help the baking process and make the crust more crispy, use pizza pan with holes. Thanks to CY from Eat First, Diet Later for this recommendation.

2) To absorb the moisture of the dough and add some crunchiness to the pizza, I used semolina flour before pushing out my pizza. Watch this video clip. Thanks to Sedazh of Annemin Sable Biskuvisi for her recommendation on using semolina.
3) Do not overload the pizza with your toppings. Otherwise, the dough will not be cooked thoroughly. Avoid using ingredients that are too wet.
5) You can freeze the dough after kneading (step 3), put it in a lightly oiled container/ zipper bag) and freeze. On the day of making pizza, bring it out from the fridge. Cover and thaw for 2 hours. Let it rise according to the spec.
6) You can also half bake the pizza dough and keep for future usage. This result is similar to those pre-baked dough sold in the supermarket.
Other useful references:
-Video clip (how to make pizza) - click here
- Kitchen unplugged
- Eat First, Diet Later


42 comments:
First of all, what a cutie-pie!!! The pizza looks fab and thanks for the tips!
Your pizza looks great! And, it looks like it was a hit. Very cute.
goodness - look at that face! how could anything NOT be delicious and irresistible if he makes that face after eating it?
:)
Redmenace: Tks for dropping by. Hope to see you again!
Lisaiscooking and Pearl: Tks for your kind words. ;)
So cute!!
I love making pizzas but I tend to get overboard and end up with a mountain.
Wah, you are so talented, can make pizza at home. Bowing down.
oh I cannot not look at your lil' one's photo :) :) esp the middle foto, and that chubby cheek... sweet!!!!!!!!!!!
btw, I love all the food photos you taken, the layout and color are popping, as usual! (and thanks for linking me :):)
oh I cannot not look at your lil' one's photo :) :) esp the middle foto, and that chubby cheek... sweet!!!!!!!!!!!
btw, I love all the food photos you taken, the layout and color are popping, as usual! (and thanks for linking me :):)
It looks great! U're competing with Pizza Hut huh? ;p
Applause applause! The first and last time I made my own pizza dough was in secondary school home economics class. Ever since, I use other bread base as my pizza base if I made pizza at home. I salute u!
I love the photos of your little one enjoying the pizza! (although no bib could contain the mess my 2 made when they were toddlers...)
I am too lazy to roll out my dough so neatly like you, I cheat and stretch it out to the sides! Yours looks fabulous!
i like pizza , site very grade and benefit for me. thank info pizza
Rasa Malaysia: Tks for your XXXXL cap! Looking at your multi-national cooking & baking recipes cum excellent photography skill, I have only 1 thing to say, "五体投地”.
Gattina: Tks for your compliments. For the link, don't mention it. I really luv reading your blog. Besides your stunning shots, I gave you 2 thumbs up for all the recipes featured in your blog. Hope to see you posting more in future. ;)
Dora: Oh, do u really think I can compete with Pizza Hut? Hehehe!
Tigerfish: Paiseh! Paiseh! My pizza is only great in the eyes of my lil tot. I am sure you can do better than me with your current cooking experience.
CY: Tks for your compliment and the great tip on using the pizza pan with holes. It really helps. Your pizza looks great to me too. ;)
Bayu: Welcome to my kitchen and thanks for your kind words. Hope to see you in my kitchen again.
Delicious and your son certainly enjoyed it. He is a cutie, btw!
You have a gorgeous blog and I can't wait to explore it.
Thanks for visiting!
Thanks for visiting.
Wow! What a success story? Bravo Chef! I love your beautiful pizza too, can I be the most happiest guest in town by eating your homemade pizza??? *wink*
hello hello.. can i have a piece pls?? looks so yummy!!!
Definitely can tell how yummy your homemade pizza is, from your son's face. I want a slice.. or a pan!!! :D
The little guy looks like he is loving every bite of the pizza!
lk,
I have made pizza once but I bought ready made pastry!! So, I cheated!! :P
I think one day I need to do everything from scratch!
Your pizza looks scrumptious!
Clap Clap! I still remember first time I made pizza at home from scratch! It's scary.... Now let's enjoy the fun making pizza! ;)
LCOM: Tks for your kind comments. My son is a food-lover.;)
Cynthia: Your compliments gave me a lot of encouragement. Tks for dropping by.
Alice (BOLNT): Hey, there are 2 gentlemen waiting for u to make them the happiest men in the world, u know? Quick, act on it!
NKOTB & Selba: No problems! You are always welcome.
Maya: Tks for dropping by. My lil tot is a BIG fan for pizza. ;)
Lee Mei (MCH): I am sure yours will definitely look better than mine. Remember to share with me your success story. ;)
Looks like the perfect pizza - your little one sure thinks so!
Wow, really a tough job to make pizza from scratch. It looks so yummy!
It looks superb man! I gotta get myself a pizza pan too, hee
hahha... ur boy really happy ... for sure !!! i m lazy, i choose the ready made pizza base , even the ready made sos!! :P
Should have learn from u one day - homemade pizza !!
Hmm great pizza, i also want one :)
Thanks for sharing with us this wonderful recipe. Will give it a try soon as all my little nephews and niece really love pizza.
Cheers
Olivia
Pam: Mine is just average as compared to your fabulous pizza! How I wish I can make one as perfect as yours. ;)
Little Inbox: I think this is just a learning curve. For those pro bakers, this is an easy-peasy job.
Noobcook: Looking forward to read your pizza posting. ;)
Anggie's Journal: Hehehe....I dun mind to cheating when I am running out of time.
Olivia: Tks for dropping by and your compliments. Do let me know the outcome if you try it out later.
What a beautiful pizza, and you're so neat while in the process too.
The look on your cute son face said it all. It must be really good. I too prefer to make my own pizza as i get to put my fav toppings :)
What a cutie! Homemade pizza is always the best :)
I love homemade pizza, and yours looks incredible! What a great photo!
Thanks for sharing!
Yum. I don't think there's much that beats homemade pizza.
And Pearl is right -- how can that sweet boy be wrong??
I recently came accross your blog and have been reading along. I thought I would leave my first comment. I dont know what to say except that I have enjoyed reading. Nice blog. I will keep visiting this blog very often.
Kaylee
http://grillsblog.com
hyingu
Why am I missing the photos? I feel hungry and I can't even have a virtual bite. Bummer!
WoW! so gorgeous . . . . not only refering to your izza but your little cute!
oh you had won a prize on my blog!
Shavedicesundays: Thanks for your kind words. ;)
ICook4Fun & Katie: Totally agreed!! Nothing beats homemade. It is so fun to mix-n-match our favourite toppings. ;)
Finsmom: Tks for your compliments. I am so flattered!!
Lo: Tks for dropping by and your nice words. ;)
Kaylee (Quanton): Tks a LOT for your support!!! It gave me a lot of encouragement. Hope to see you in my humble kitchen more often!
Tigerfish: Tks for the alert! Photobucket had temporarily disabled my link as I had exceeded their monthly bandwidth. They acted faster than I tot. No choice but to upgrade my account. Haiii..!
Big Boys Oven: Tks for your compliments. Got to warn u...he is a cheeky little fellow! Btw, tks for the prize. U had made my wish come true! ;)
You have one very happy customer! Making the dough for the base must be the toughest. I know how to eat only.
Wow...what a nice continuous pic of your boy...he sure looks cute.
The pizza sure looks good...you are a step higher in your skills in baking and photography now.
Worldwindows: Hahaha! He is always my loyalty customer! I guess it is an easy-peasy job for those professional bakers. ;)
CK Lam: Tks for your compliment. I am still at the learning stage. You have progressed faster than me. Your shots look so professional now! 佩服!佩服! ;)
Pigpigscorner: Sorry that I missed out your comment. Sometimes I also can't resist the temptation to go overboard with the toppings. Hehehe!
Post a Comment