2009/05/13

Food-4Tots has moved to www.food-4tots.com. Please update your link!

Source:Canon Creative Park

Hi Everyone, I am back now! Thanks for being so patient with me. Setting up a new site is really another big challenge to me. It took longer than expected. But, I am glad that it is finally ready for your viewing.

From today onwards, Food For Tots will discontinue its blogging activities at http://food-4tots.blogspot.com/ and move over to its new home http://food-4tots.com/ together with all its previous postings.

Don’t forget to update your link to my new site. For existing email subscribers, remember to re-submit your request at my new site so that you will not miss out any updates and recipes.

So, hop over to my new home now. ………! No house warming present required.

READY………..GET SET………GO => MY NEW HOME


2009/05/01

Food For Tots - new site

Dear Readers,

Today, I had migrated all the postings and comments from Blogspot to my new site and will inform everyone once the new site is ready. Have a nice day!

2009/04/27

Salmon cakes - Feature recipe for My Cooking Hut


Ever since I was a child, I perceive and express better through pictures instead of words. In scientific term, I am a right brain person. (No wonder I did badly in written essay in my school years. ) Now, whenever I search for recipes online, I am easily sold by impressive-looking photos. They motivate me to try the recipes out as soon as I can lay my hands on the ingredients. If you love to see beautiful photos as much as I do, then you should take a peep at the photo gallery of My Cooking Hut. It is one of those fabulous food blogs I am really hooked on. Every shot taken by Lee Mei, who is a freelance photographer, is awesome and of professional-quality. With excellent food styling skills and perfect propping, she set the right mood and theme for her readers. Every time I visit her blog, I love to admire her photo shots, more as a piece of fine art than just a normal food photo. It gives me lots of inspiration, tips and ideas in food photography. Apart from photography, she is also a very talented cook. You can find a variety of Eastern and Western cuisines featured in her blog that ranges from Asian stir-frying dishes to French delicate dessert. Her blog is my main reference for simple yet delicious recipes.

When Lee Mei wrote to me to ask if I am interested to be her guest writer, I was awe and surprised . I started scratching my head as what to feature on her beautiful blog. After some discussions, we decided on salmon cakes with an Asian twist. Today, I feel so honoured to be the guest writer for My Cooking Hut. Without further delay, let me bring you over to visit Lee Mei’s nicely decorated “hut” and savour my salmon cakes virtually with just a click here.

2009/04/19

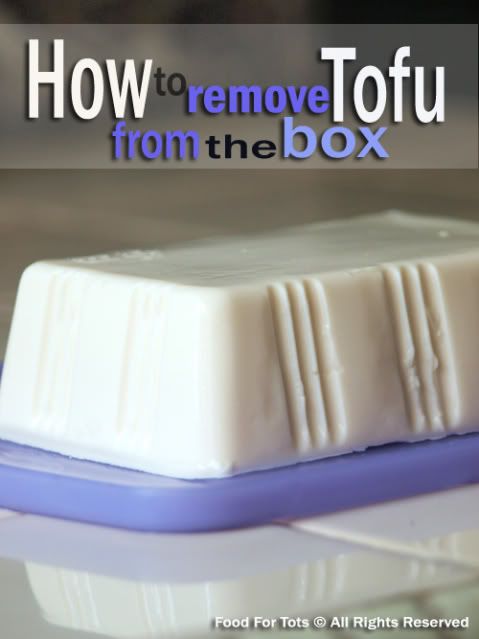
How to remove tofu from the box

tofu, beancurd, trick, technique, Food For Tots

From the day I got “promoted” to be the family’s “chief chef” (as mother-in-law was no longer staying with us), I have been calling my mother more often than before to consult her on cooking-related matters. I felt so fortunte that she provided me with a 24/7 phone support service. Thanks a lot, mom!

Nowadays, we love to exchange ideas and tips on how to improve our cooking skills. On one occasion, she asked me what is the best way to remove tofu from the box. And, I happily shared with her a technique which I came to regard as the perfect technique. Subsequently, I was surprised to find out that my technique didn’t actually work for her.

When I was back in Penang for holiday last December, she told me that she had found an even better technique. At first, I was quite skeptical about it. But, after watching her demo and trying it out on my own, I was totally convinced that her method is indeed simple and 100% fail proof. Even my hubby scored 100 marks on his first attempt!

Now, let me share with you my mother’s “5 simple steps to remove the whole tofu perfectly from the box”. Below is the demo done by my hubby. Try it out to see whether it works on you. If you have better tricks, do share with me!

Step 1: Trim off the edges of the box with a pair of scissors. Peel away the plastic paper.


Step 2: Make a small incision at the side between the tofu and the wall of the box. Let slow running water sip into the incision. Repeat this step for each side. With sufficient water, the tofu will float up by itself.


Step 3: Cover the box with a plate, tray or anything with a flat surface.


Step 4: Flip it over.


Step 5: Now you can remove the box easily and get the "perfect-looking" tofu for your cooking!

2009/04/08

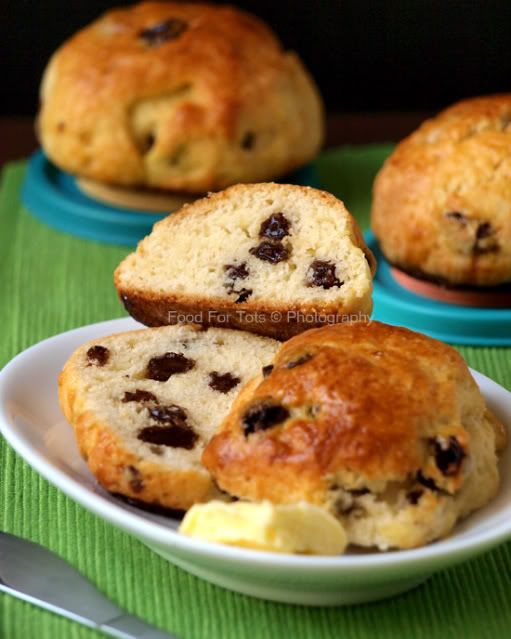
Raisin scones

scones, raisins, raisin scones, Food For Tots, food for toddlers

Scone is a small British quickbread of Scottish origin. The original scone was round and flat, usually the size of a small plate. It was made with unleavened oats and baked on a griddle, then cut into triangle-like quadrants for serving. Today, scones sold commercially are usually round in shape but homemade scones have taken into various shapes: triangles, rounds and squares.

What is a good scone?


I can’t agree more to Regan Daley’s from Fine Cooking on his definition of good scone. He wrote in his article “Truly Tender Scones” that a good scone is a beautiful balance of opposites: rich but light, tender but sturdy, satisfyingly sweet but not overly so. He also emphasized that the key to master the technique for scone dough is to mix as little yet as thoroughly as you can.... even novice bakers can get used to the feel of the dough without sacrificing tenderness.

Recently, my family members are “addicted” to scones. This includes my mother-in-law who doesn’t have a sweet tooth. But it is not easy though to find good scones around our neighbourhood bakeries. We did come across one that sells reasonably good scones that are to our liking. However, its scones are always sold out early. Because of this, I decided to bake my own scones. To my surprise, it is easier than I had imagined. It only requires a few simple ingredients and the method is easy enough to follow. No kneading is required. However, there is one thing you need to be extra careful, i.e. you must understand the technique in preparing the dough. Even then, it should not put anyone off as a novice baker like me had passed my first attempt with "flying colours"!
As forewarned, the making of good scones lies in the technique itself. If you are one who is looking for stress-releasing recipes, this one is surely not your type. Unlike the making of pizza and fish paste, this following recipe requires you to handle the dough as gentle as possible. The lesser you work at it, the more tender the scones will become. Doesn't this sound great to all the novice bakers!

Recipe adapted and modified from Mitong’s blog (originated from Farmgirl’s Cranberry Christmas Scones) and technique adapted from House of Annie’s blog (originated from Fine Cooking Magazine)


Yields: 10 large or 12 small scones

Ingredients:
2¼ cup unbleached/ plain flour
1 tbsp baking powder
½ tsp baking soda (I substitute it with ½ tsp baking powder)
¼ cup granulated sugar
½ tsp salt
½ cup (110g) unsalted butter, chilled and cut into small cubes (½ inch )
¾ cup raisins (can be substituted with dried currants) - soaked with 2 tbsp of hot water for 5 mins, squeezed away the water
¾ cup yogurt mixture (3 tbsp yogurt + some fresh milk + ½ egg) or ¾ cup buttermilk

Egg wash:
½ egg + 1 tbsp milk – beat well with a fork

Methods:
(A) Mixing of ingredients
1) Preheat oven to 200ÂșC. Line a baking tray with grease-proof paper.
2) In a large mixing bowl, add in flour, baking powder and baking soda and whisk until mix well. Sieve 2-3 times (see Note a)
3) Add in sugar and salt. Mix well.
4) Add in butter cubes. Use a pastry blender (see photo below), table knife, fork or tips of fingers to cut butter into the flour mixture until it forms coarse crumbles. (see Note b)
5) Add in raisins and stir gently until well combined.
6) Beat yogurt, milk and egg until well combined. Gently fold the yogurt mixture into the dry ingredients, mixing lightly just until no dry flour is visible (see Note c & d). The dough will be wet and sticky.

(B) Shaping the dough
1) Sprinkle flour lightly on both the dough and the work top. Turn the dough out and roughly work it into a ball. Press the ball down into a rectangular shape. Sprinkle some flour if the dough is still wet.
2) Fold the dough like the way you fold a business envelope (in 3rd, 1st first right fold to center, then left fold to center). It is alright if the dough is still quite shaggy and loose at this stage.
3) Then press the dough down to form either a circle or a rectangular.
For circle, cut it into 8 large or 16 small triangle scones.
For rectangular, cut it into 10 large or 12 small squares. Push the edges roughly to shape it into a round scone. You can also use a cookie cutter or an upside-down juice glass to cut out the scones.
4) Dip the top lightly on the egg wash and then brush it with the remaining egg wash again. Place them on a baking tray, spacing them about 4cm apart.
5) Bake for 15 – 20 mins (depending on the shape and size of your scones) until golden brown on top. Turn the baking tray over if the scones are not evenly baked. Let it cool on a rack and serve warm. Alternatively, let it cool completely and store in an airtight container or keep in the freezer.
6) How to eat scones? Cut the scones into half and spread butter/ cream/ jam onto it. And, it is best enjoyed together with a cup of coffee or tea!

Note:
a) To avoid any bitter taste that can be caused by the large amount of baking powder used in the recipe, it is important that the flour and baking powder are blended well and sieved for several times.
b) It is advisable to use a pastry blender (see photos below) to cut the butter as it releases less heat to avoid melting the butter when mixing of ingredients.
c) Do not knead or overwork the dough. The less you work it, the tenderer and flakier it will be. Do not pour the yogurt mixture into the dry ingredients all in one go. Add in little by little and stop once a loose dough is formed. You need not finish using all the yogurt mixture.
d) Quality of butter is important to give your scones a more buttery flavour. I suggest that you select a premium brand such as Luprak in making your scones. It definitely makes a difference in the taste.