Showing posts with label baking - bread/ bun/ roll. Show all posts

2009/04/08

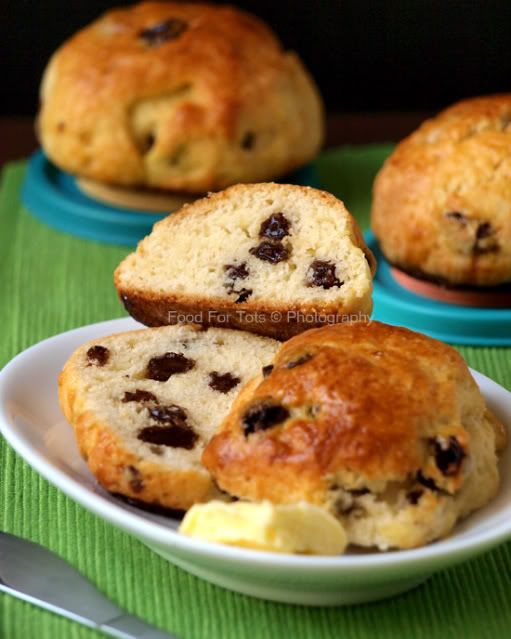
Raisin scones

scones, raisins, raisin scones, Food For Tots, food for toddlers

Scone is a small British quickbread of Scottish origin. The original scone was round and flat, usually the size of a small plate. It was made with unleavened oats and baked on a griddle, then cut into triangle-like quadrants for serving. Today, scones sold commercially are usually round in shape but homemade scones have taken into various shapes: triangles, rounds and squares.

What is a good scone?


I can’t agree more to Regan Daley’s from Fine Cooking on his definition of good scone. He wrote in his article “Truly Tender Scones” that a good scone is a beautiful balance of opposites: rich but light, tender but sturdy, satisfyingly sweet but not overly so. He also emphasized that the key to master the technique for scone dough is to mix as little yet as thoroughly as you can.... even novice bakers can get used to the feel of the dough without sacrificing tenderness.

Recently, my family members are “addicted” to scones. This includes my mother-in-law who doesn’t have a sweet tooth. But it is not easy though to find good scones around our neighbourhood bakeries. We did come across one that sells reasonably good scones that are to our liking. However, its scones are always sold out early. Because of this, I decided to bake my own scones. To my surprise, it is easier than I had imagined. It only requires a few simple ingredients and the method is easy enough to follow. No kneading is required. However, there is one thing you need to be extra careful, i.e. you must understand the technique in preparing the dough. Even then, it should not put anyone off as a novice baker like me had passed my first attempt with "flying colours"!
As forewarned, the making of good scones lies in the technique itself. If you are one who is looking for stress-releasing recipes, this one is surely not your type. Unlike the making of pizza and fish paste, this following recipe requires you to handle the dough as gentle as possible. The lesser you work at it, the more tender the scones will become. Doesn't this sound great to all the novice bakers!

Recipe adapted and modified from Mitong’s blog (originated from Farmgirl’s Cranberry Christmas Scones) and technique adapted from House of Annie’s blog (originated from Fine Cooking Magazine)


Yields: 10 large or 12 small scones

Ingredients:
2¼ cup unbleached/ plain flour
1 tbsp baking powder
½ tsp baking soda (I substitute it with ½ tsp baking powder)
¼ cup granulated sugar
½ tsp salt
½ cup (110g) unsalted butter, chilled and cut into small cubes (½ inch )
¾ cup raisins (can be substituted with dried currants) - soaked with 2 tbsp of hot water for 5 mins, squeezed away the water
¾ cup yogurt mixture (3 tbsp yogurt + some fresh milk + ½ egg) or ¾ cup buttermilk

Egg wash:
½ egg + 1 tbsp milk – beat well with a fork

Methods:
(A) Mixing of ingredients
1) Preheat oven to 200ÂșC. Line a baking tray with grease-proof paper.
2) In a large mixing bowl, add in flour, baking powder and baking soda and whisk until mix well. Sieve 2-3 times (see Note a)
3) Add in sugar and salt. Mix well.
4) Add in butter cubes. Use a pastry blender (see photo below), table knife, fork or tips of fingers to cut butter into the flour mixture until it forms coarse crumbles. (see Note b)
5) Add in raisins and stir gently until well combined.
6) Beat yogurt, milk and egg until well combined. Gently fold the yogurt mixture into the dry ingredients, mixing lightly just until no dry flour is visible (see Note c & d). The dough will be wet and sticky.

(B) Shaping the dough
1) Sprinkle flour lightly on both the dough and the work top. Turn the dough out and roughly work it into a ball. Press the ball down into a rectangular shape. Sprinkle some flour if the dough is still wet.
2) Fold the dough like the way you fold a business envelope (in 3rd, 1st first right fold to center, then left fold to center). It is alright if the dough is still quite shaggy and loose at this stage.
3) Then press the dough down to form either a circle or a rectangular.
For circle, cut it into 8 large or 16 small triangle scones.
For rectangular, cut it into 10 large or 12 small squares. Push the edges roughly to shape it into a round scone. You can also use a cookie cutter or an upside-down juice glass to cut out the scones.
4) Dip the top lightly on the egg wash and then brush it with the remaining egg wash again. Place them on a baking tray, spacing them about 4cm apart.
5) Bake for 15 – 20 mins (depending on the shape and size of your scones) until golden brown on top. Turn the baking tray over if the scones are not evenly baked. Let it cool on a rack and serve warm. Alternatively, let it cool completely and store in an airtight container or keep in the freezer.
6) How to eat scones? Cut the scones into half and spread butter/ cream/ jam onto it. And, it is best enjoyed together with a cup of coffee or tea!

Note:
a) To avoid any bitter taste that can be caused by the large amount of baking powder used in the recipe, it is important that the flour and baking powder are blended well and sieved for several times.
b) It is advisable to use a pastry blender (see photos below) to cut the butter as it releases less heat to avoid melting the butter when mixing of ingredients.
c) Do not knead or overwork the dough. The less you work it, the tenderer and flakier it will be. Do not pour the yogurt mixture into the dry ingredients all in one go. Add in little by little and stop once a loose dough is formed. You need not finish using all the yogurt mixture.
d) Quality of butter is important to give your scones a more buttery flavour. I suggest that you select a premium brand such as Luprak in making your scones. It definitely makes a difference in the taste.


2009/03/13

Homemade pizza

Homemade pizza, Food For Tots

Homemade pizza can be either simple or difficult depending on which approach you adopt. The simple approach is to buy frozen pizza base and ready made sauce. But I chose the the difficult one, which means making the dough and sauce from scratch. As what my hubby had predicted, I failed terribly in my first attempt. I had a tough time kneading the dough and the pizza base was not cooked thoroughly. I hate it when he made this kind of prediction. Is it a curse?
The experience on my 2nd attempt was even worst. While waiting for the dough to rise, my son came down with high fever during his afternoon nap. It left me no choice but to send the dough straight to the freezer. Luckily, the dough was still edible after my long holiday in December.

From all these failures, I learnt 3 important things – (1) the dough must be well-kneaded until it is smooth and elastic, (2) the dough must get enough time to rise and (3) tossing pizza - I have not mastered this skill yet. To save time, I cheated by rolling out the pizza and then strecthing it further using my knuckles. You can say that practice makes perfect and your hands are the best judge when the dough is done just right.

As a non risk-taker, I plan to make a small-sized pizza so it is less wastage in case of failure. However, most of the wonderful pizza recipes that I like, yield larger size pizza. After much searching, I decided to adapt and modify a recipe from Mitong’s blog (click here) as her recipe requires only a small amount of ingredients. It is also very easy to follow thru with her step-by-step instruction. Although it may not be the most “authentic” pizza recipe, it had at least boosted my confidence to take the first step in my pizza making journey. Meanwhile, I had also incorporated some useful tips from Rose’s Recipe in my recipe.

During my past few attempts in making pizza, I had encountered many technical issues which I couldn't figure out. Luckily, there are some kind-hearted people who are willing to share their valuable advices and tips with me. Hence, let me take this opportunity to thanks everyone who had advised me before. Without them, I will not be able to write up this posting.

I had tried to keep this recipe as simple as possible so that it will be easy for any beginner to bake their first successful homemade pizza. Making your own pizza is not really as difficult as you think. The more you try, the more you will love making it. You don't need to bake the best pizza in town. But I can guarantee you that your kids will be the happiest people in the world when eating your homemade pizza. Look at the photos below. Do you agree with me?

Photobucket

(A) Basic pizza sauce

Ingredients:
½ can diced tomatoes (I used tomato sauce when I made this pizza. But diced tomato is still a better choice)
2 tsp tomato paste
1 tsp minced garlic
½ onion (minced)
1 pc bay leaf
1 tsp mixed herbs
2 tbsp olive oil
100ml stock
2 tsp sugar
Salt and pepper to taste

Methods:
1) Heat up oil in a pan. Stir-fry garlic, onion and mixed herbs until fragrant.
2) Add in diced tomatoes, stock, bay leaf, tomato paste, salt, sugar and pepper.
3) Simmer for 30 mins, or until the tomatoes have reduced to a thick pulp.
4) If you prefer a smooth pizza sauce, let the sauce cool a little and then puree it in a blender.
5) If the sauce is too watery, add some cornstarch to thicken it.
6) You can make this sauce one day in advance.

(B) Basic pizza dough (makes 1 x 11 inches pizza)

Ingredients:
200g bread flour (high protein flour)
1 tsp instant yeast
½ tsp salt
2 tbsp olive oil
120g lukewarm water (45 C)

Methods:
1) In a small bowl, dissolve yeast with some lukewarm water. Let it stand until the yeast becomes creamy (about 8-10 mins).
2) In a large mixing bowl, whisk bread flour and salt to mix. Make a well in the center. Pour in yeast (from step 1) and oil. Fold with a large spoon or spatula. Add in the remaining water little by little till all the ingredients are well combined. Flour your hands and knead briefly to form a soft dough.
3) Bring the dough out and continue kneading on a lightly floured surface until smooth and elastic (about 10 mins). During kneading, if the dough is too dry, sprinkle in a little more flour. If the dough is too wet, dribble in 1-2 tsp of water.
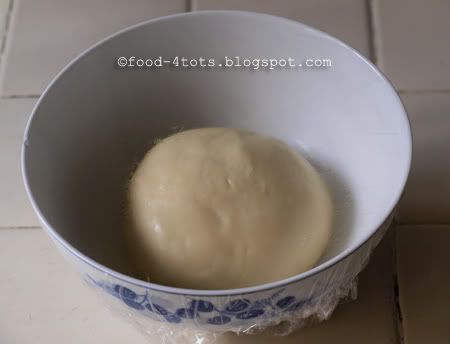
4) Place the dough in a lightly greased bowl, turning once (to make sure it is coated with oil) and cover with a damp cloth/ cling wrap.
Photobucket

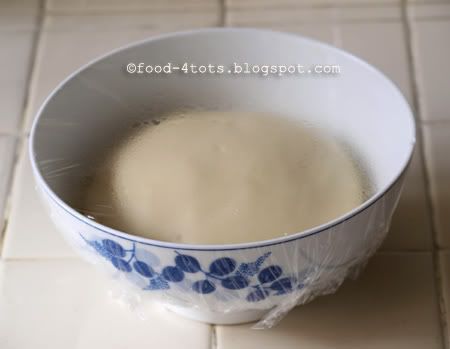
5) Let it to rise in a warm place until the dough has doubled in size. It takes about 1-1 ½ hours.
Photobucket

6) Gently punch down to deflate the dough. Knead and shape into a ball.
7) Stretch the dough using your hands or roll it out using rolling pins to your desired thickness. Tossing pizza is an important step in producing a more tender and crispy crust. Watch this video clip for the technique.
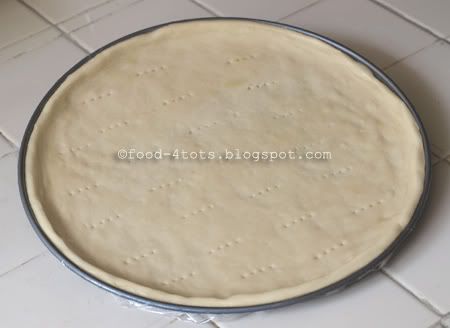
8) Place the dough on a lightly greased pizza pan. Push up the dough to make a rim or a twisted border. Use a fork to prick some holes on the pizza. (This is my personal preference. You can omit this). Brush or spray the dough lightly with olive oil. Cover with cling wrap and let it rest for 15 mins.
Photobucket

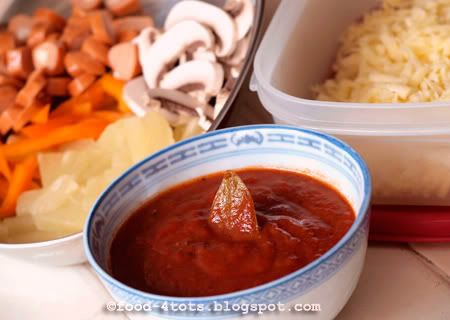
9) Prepare your toppings (such as capsicum, sliced black olive, pineapple cubes, cherry tomatoes, fresh sliced mushrooms, sweet corns, cooked shredded chicken, cooked prawns, hams, sliced sausages, canned tuna, pepperoni etc).
Photobucket

10) Preheat oven to 200C.
11) After 15 mins, lightly spread the dough with pizza sauce, and then follow by cheese and lastly your choice of toppings. You can also add some extra cheese on top of your toppings.
12) Bake at 200C for 15-20 mins, or until it turns golden brown.

Photobucket

13) Remove the pizza from the oven and transfer to a cutting board. Wait for 3-5 mins before slicing to allow the cheese to set.

Tips:
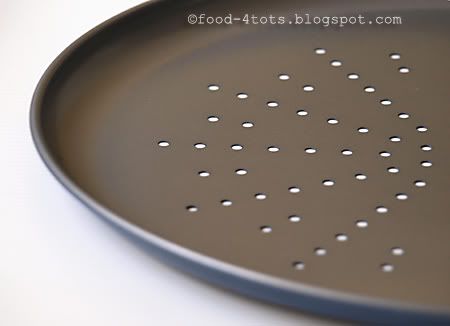
1) To help the baking process and make the crust more crispy, use pizza pan with holes. Thanks to CY from Eat First, Diet Later for this recommendation.
Photobucket

2) To absorb the moisture of the dough and add some crunchiness to the pizza, I used semolina flour before pushing out my pizza. Watch this video clip. Thanks to Sedazh of Annemin Sable Biskuvisi for her recommendation on using semolina.
3) Do not overload the pizza with your toppings. Otherwise, the dough will not be cooked thoroughly. Avoid using ingredients that are too wet.
5) You can freeze the dough after kneading (step 3), put it in a lightly oiled container/ zipper bag) and freeze. On the day of making pizza, bring it out from the fridge. Cover and thaw for 2 hours. Let it rise according to the spec.
6) You can also half bake the pizza dough and keep for future usage. This result is similar to those pre-baked dough sold in the supermarket.

Other useful references:
-Video clip (how to make pizza) - click here
- Kitchen unplugged
- Eat First, Diet Later

2009/02/28

Sausage rolls

sausage rolls, rolls, sausage
(My "night" project...roll with cocktail sausage fresh from the oven)

I always wish that I can make some bread and rolls for my family since we eat them for breakfast almost every day. As we say a wish is still a wish if no action is taken. But when I chanced upon Elinluv’s blog, I was so inspired with her success story in making sausage rolls (originated from dailydelicious). What makes me even keener in trying out this recipe is her creativity in baking 3 different types of buns using the same dough for sausage rolls. Then I started daydreaming....how nice if one day I can bake all these buns like her.


At dinnertime, when my son overheard my conversation with my hubby about making these sausage rolls, he was so excited and kept pestering me to make them on that particular night. He even offered to go straight to bed without his daily routine story-telling session. From this, you can imagine how “wai sek” (greedy) my son is! I was so touched with his eagerness and of course, he won the deal! This meant that I had to complete the project on the night itself by hook or by crook!! From mixing, kneading till baking, it took nearly 3 hours (much of the time was spent waiting for the dough to rise)! It was already passed midnight when the finished “products” were done. I was really thrilled to see the freshly baked sausage rolls coming out from my own oven! Overall, the buns tasted great. Just that they are a little bit dry the next day. Probably the problems lied on my poor kneading skills and placing the baking sheet at a lower rack during baking. Despite of this, my hubby and son finished all the buns within 2 days. It’s certainly worth the time and effort that goes into the “project”. I will definitely give this recipe another go….maybe not another night project…. (When? This is a secret to be kept from my son….. Shhhhh!)

Recipe adapted from dailydelicious (here and here)
For step-by-step instructions, please refer to this link.

Ingredients:
300g bread flour
5g instant dried yeast
10g sugar
6 g salt
30g unsalted butter (soft)
220-230g 1 egg plus whole milk (I used fresh milk)
8 pieces normal size sausages (I used 8 cocktail sausages and 4 normal sausages)
Egg wash - 1 egg plus 2 tsp water

Methods:
1) Put ½ portion of the flour and yeast in a bowl, whisk to combine, add sugar and salt and whisk again.
2) Pour the egg and milk mixture into the bowl. Use a large spoon (or pastry scraper) to mix everything together.
3) Put the remaining ½ portion of the flour into the bowl and knead briefly to combine all the ingredients.
4) Take the dough out of the bowl and knead. You will feel the dough become elastic after kneading for about 5 minutes.
5) Add butter and knead by using the heel of your hands to compress and push the dough away from you, then fold it back over itself. Give the dough a little turn and repeat. Put the weight of your body into the motion and get into a rhythm. Keep folding over and compressing the dough. Knead for 5-10 minutes or until the dough is soft, pliable, smooth and slightly shiny, almost satiny. Or you can also try stretching part of the dough, if it can stretch into a thin sheet without breaking, the dough is well-kneaded.
6) Put the dough into a lightly buttered bowl and cover with damp cloth. Let the dough rise in a warm place until its size doubles (1 – 1 ½ hour depending on the room temperature).
7) Take the dough out of the bowl, deflate it by touching lightly.
8) Cut the dough into 8 pieces, roll into a ball and let them rest for 10 minutes (cover with damp cloth).
9) Use a rolling pin to roll the dough into an oval shape, then place the sausage in the center. Cut both sides of the dough into 7 strips. Fold the strips alternating the left and right over the sausage.
10) Place the rolls on the greased baking sheet. Cover the rolls and let it rise until it almost doubles in size. Brush with egg wash. Preheat oven at 200°C. Bake at 200°C for 8 minutes then at 180°C for another 5 minutes or until the rolls turn golden brown.

Photobucket
(Some called these rolls "pig in a blanket". But it reminds me of my son when he was a newborn. Dun they resemble those newborn babies sleeping soundly in the feeding room? Hehehe!)

2008/08/29

Simple pizza bread

Photobucket

We love pizza and always want to bring our son to eat pizza. But the strange thing is whenever we dined out, we always ended up with something else. The reason is my "emperor" only prefers authentic pizza and we are still searching for one.

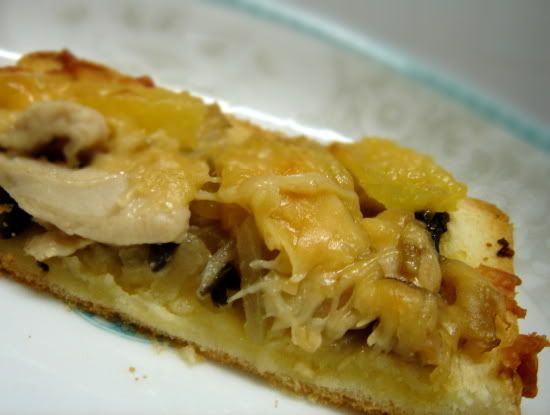
As I don’t have an oven now, it is impossible to make a homemade pizza. Recently I found an interesting posting at this blog about no-dough pizza bread! At least, my oven toaster can be fully utilised now. This recipe is indeed very simple and easy. Just right for a lazy person like me that can simply make a nice toast that looks like pizza! What I did is to toast the pizza bread after my son goes to bed. After toasting, let it cool off at the room temperature. Keep it in a container and put in the fridge. Tomorrow morning, I just need to slightly toast them to reheat the bread and serve them as our breakfast. As what the food blogger said, there are many ingredients you can use to make this pizza bread. Some of them are: chicken, capsicum, sausage etc.

Here is the one of the versions I had made (based on my own creativity) for my breakfast today:

Ingredients:
4 white toast breads
1 palm-size chicken breast meat (cut into chunks)
½ white onion (sliced thinly)
4 button mushrooms (sliced)
8 cubes canned pineapples (drained and sliced)
5+1 tbsp butter (I used a mixture of ready-made garlic spread and butter)
Fresh grated parmesan cheese or any type (2 cups) - I put plenty because we like cheese!
Dash of sugar and pepper

Methods:
1) Marinate chicken with light soya sauce, sugar and corn flour for at least ½ hour.
2) Heat up a pan with oil and 1 tbsp butter, sautee onion until translucent. Add in mushroom, dash of sugar and pepper. Mix well and stir fry for a while. Add in chicken meat. Stir-fry until it turns brown. Dish up and set aside.
3) Cover baking tray with aluminum foil. Put breads and toast for 3 mins.
4) Flip them over and spread butter and garlic herb spread (ready-made) on the untoasted side. 5) Arrange all the stir-fry ingredients, pineapples and cheese on the bread.
6) Toast for 15 mins or until the cheese melts and turns golden brown.